-
E-mail
info@jscmkj.com.cn
-
Phone
18112375870
-
Address
No. 19 Hefeng Road, Xinwu District, Wuxi City, Jiangsu Province
Jiangsu Chenming Technology Co., Ltd
How to install wall mounted sensors to achieve good energy efficiency and indoor air quality
Date: 2025-11-03Read: 8
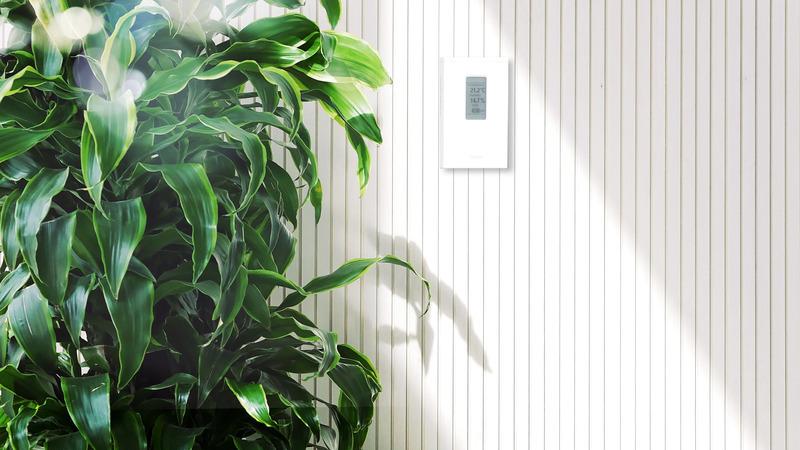
Even high-quality carbon dioxide, temperature, and humidity measuring instruments can provide inaccurate readings if installed improperly. These installation tips for wall mounted sensors can help you ensure that people inside the building can enjoy fresh air, comfortable temperatures, and healthy humidity levels. If the sensors are installed correctly, the HVAC system can respond more accurately to constantly changing conditions, thereby improving user comfort and reducing energy waste.
Why is proper sensor installation important
Improper installation of sensors is one of the common reasons for inaccurate measurements. High quality sensors can provide accurate measurements over the long term, provided they are installed correctly. All factors, from nearby heat sources to installation height, can affect readings, leading to low energy efficiency and poor indoor air quality. Understanding installation errors that need to be avoided will help you provide good measurement data for your HVAC system.
Where should wall mounted sensors be installed?
Wall mounted sensors (also known as room or space sensors) play a crucial role in monitoring the conditions of people inside buildings. As human comfort and safety are the primary considerations in HVAC control decisions, proper sensor installation is crucial to ensure accurate readings and good system performance.
You control the airflow and air quality to ensure the health and comfort of people in the space, so wall mounted sensors should be installed in representative locations so that they can experience the same environmental conditions as people. It is very important to choose a location where the airflow is unrestricted and there are no thermal interference sources nearby.
Measure the parameters and positions you want to control
For carbon dioxide measurement, it is particularly important to consider what to control and where to control it. The measurement of carbon dioxide reflects the occupancy level of buildings, so that your HVAC system can provide good air quality. Therefore, it is very important to install the sensor at a position approximately at breathing height (usually about 1.5 meters above the ground) to accurately reflect the air quality that people breathe. Installing a carbon dioxide sensor too high can result in misleading readings, as carbon dioxide is heavier than air and the closer it is to the ground, the higher the concentration of carbon dioxide.
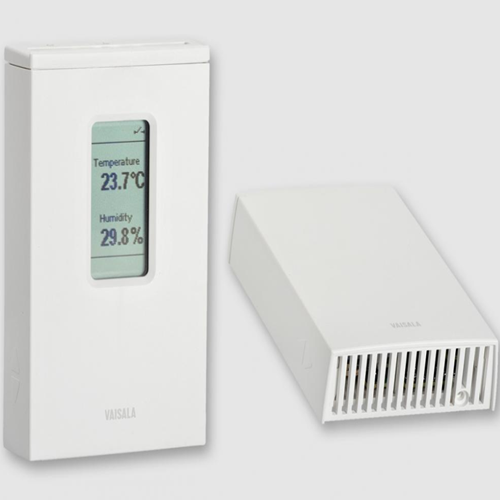
Let's take a real example. A conference center believes that their new HVAC control system operates accurately because the carbon dioxide sensors installed on the beams indicate acceptable air quality. But when measuring carbon dioxide on the ground, the concentration is astonishingly high. Installing sensors at a height where people breathe can ensure that your space is not poorly ventilated or excessively ventilated.
Another common installation error is to install the sensor in direct sunlight or near a heat source, such as a radiator or heating pipe, or above printers and copiers. Basically, like carbon dioxide, you need to ensure that what you are measuring is what people in the room actually feel.
Ensure that the sensor is facing correctly
Wall mounted sensors are designed to be installed in a specific orientation. This is because sensors and electronic devices are both housed in the same enclosure, and even low-voltage electronic devices can generate some heat. If installed correctly, heat will be dissipated through the top of the device, and fresh air will naturally flow through the sensor located at the bottom of the casing. If the sensor is installed sideways or upside down, heat cannot be dissipated and the sensor will record higher temperature readings and lower humidity readings.
If sensors are stacked and installed vertically, heat can also become a problem. The heat rising from the lower sensor will cause the temperature of the upper sensor to increase, resulting in inaccurate readings. For example, if you install a temperature or humidity sensor above a carbon dioxide sensor, you will get excessively high temperature readings or excessively low humidity readings. Ensure that the distance between sensors is far enough, or at least install sensors with higher temperatures above other sensors.
Measurement errors caused by external factors
If you install sensors in a pressurized room, the pressure difference between the room and the wall cavity may be another source of error. This is because it can cause cold air or air with low carbon dioxide concentration to flow directly into the sensor device through the wiring holes on the wall, severely distorting the readings. To prevent this situation, you should achieve sealing by adding a backing plate to the sensor box or filling the pores with sealant.
Building materials may be another source of error, especially for carbon dioxide sensors. For example, fresh concrete and certain types of plaster can absorb carbon dioxide over a period of time, significantly reducing the carbon dioxide readings in the room. Another potential issue is the use of carbon dioxide sensors with automatic background calibration (ABC) logic. This type of sensor applies calibration values to assumed levels of carbon dioxide, which may result in artificially low readings. It is best to avoid using this type of sensor.
Concrete and steel can also cause measurement errors due to their thermal conductivity. These materials are good thermal conductors, which means they may become heat sinks or sources for any sensor directly installed on them. This makes the temperature reading better represent the wall material rather than the air in the monitored space. To solve this problem, the sensor can be installed on the inner wall or insulation material can be placed between the sensor and the wall.
Finally, if there is a forced downward airflow in your space, the measured temperature may artificially increase as heat cannot effectively leave the sensor electronics. You can use sensors designed specifically for cleanrooms and other spaces with forced downward airflow to counteract this effect. In these devices, sensors are separated from electronic devices to prevent heating while still ensuring sufficient contact with the environment.
11 tips for installing wall mounted sensors
1. Install the sensor in a location that provides the same user experience as the room.
2. Ensure that there is free flowing air around the sensor.
3. Ensure that the carbon dioxide sensor is installed at a distance of approximately 1.5 meters from the ground.
4. Do not place the sensor near a heat source or in direct sunlight.
5. Install the sensor in the correct orientation.
6. Do not install one sensor directly above another sensor.
7. When installing sensors in pressurized rooms, seal the wire penetrations.
8. Do not install sensors on fresh concrete or plaster.
9. Avoid using sensors with automatic background calibration (ABC) logic.
10. Do not install sensors directly on exterior walls made of concrete or steel.
11. For rooms with forced downward airflow, use sensors specifically designed for this situation.
Correctly installing sensors is not only a technical detail, but also a key factor in maintaining a healthy and comfortable indoor environment for daily building users.