|
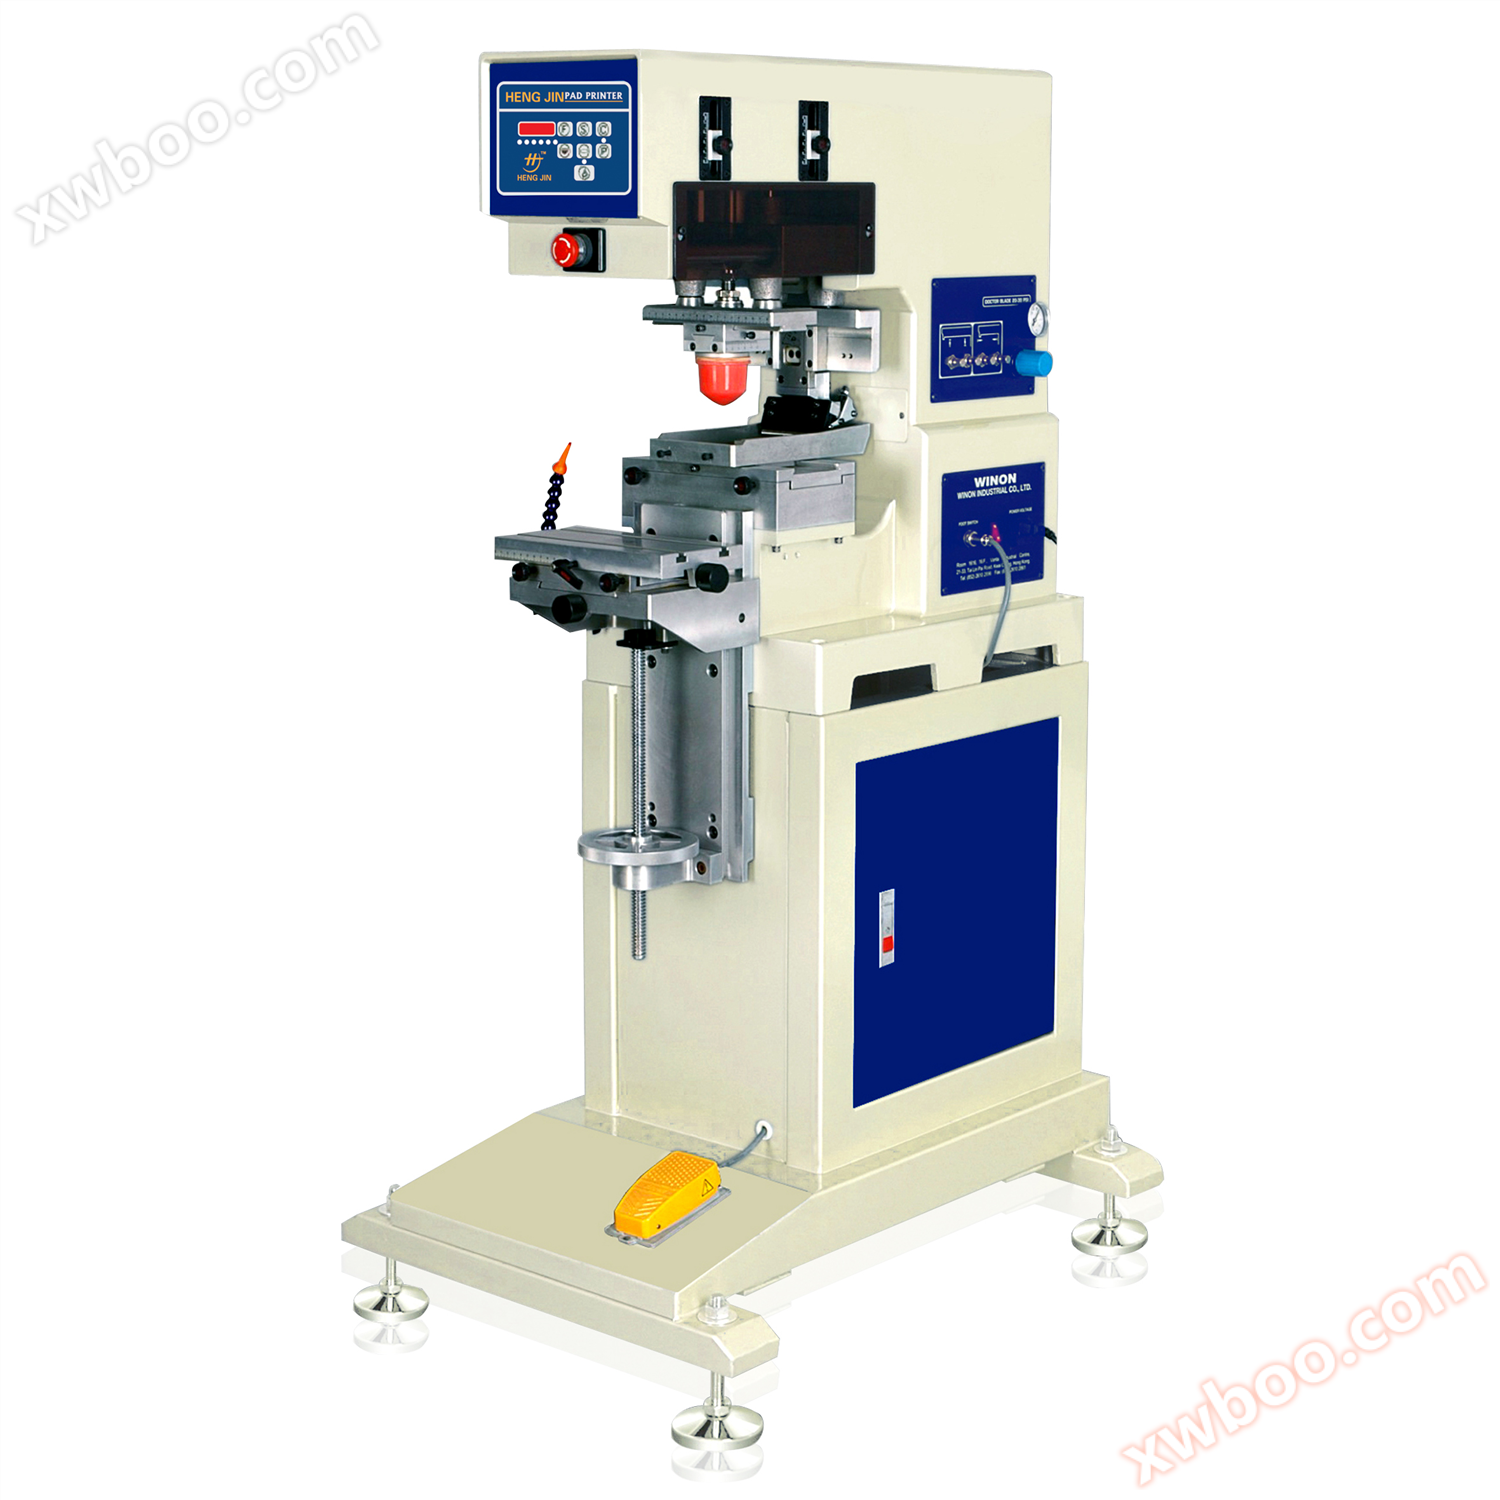
Functional Features:
1.Microcomputer controls various functional operations, with multiple printing modes to choose from, making the operation simple and convenient.
2.Equipped with an automatic four digit counter to count the number of prints.
3.The machine architecture is made of high-quality aluminum alloy, which is lightweight and sturdy, with a surface coated with metal paint.
4.Ink on the oil roller, easy to assemble, disassemble, and clean.
5.Independent rubber head up and down stroke and speed adjustment.
6.Automatic balance scraper, clean and efficient ink scraping.
7.You can transfer ink twice to obtain larger printing ink.
8.It can prevent the ink from drying and solidifying when there is a slight pause without leaving the adhesive head in the front and back blank lines.
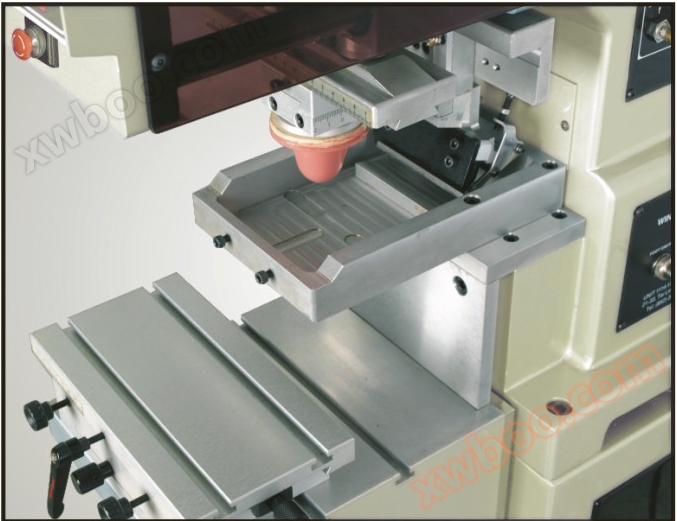
9.The workbench, rubber head, and oil pan positions can be adjustedX.Y.ZAxis arbitrary section
10.The adhesive head pressure for ink absorption and printing is independently adjustable
11.Adjustable oil scraping stroke
12.Equipped with automatic forward and backward sliding ink leveling function to prevent oil from solidifying
13.All cylinders have independently adjustable torque for speed
14.Using original Japanese equipmentSMC, Festo, GermanyGas components
15.The adjustment positions are marked with scales
16.The function of prohibiting the rubber head from falling when there is no compressed air entering
17.The whole machine runs fast, smoothly, and with low noise
Technical parameters:
|
Technical Parameter/product
|
Mini monochrome oil basin/Oil cup transfer printing machine
|
|
Standard steel plate sizemm
|
100*100/100*225
|
|
Maximum steel plate sizemm
|
150*100/100*225
|
|
Standard oil cup diametermm
|
|
|
Optional oil cup diametermm
|
|
|
printing speedpcs/hr
|
1500-1800
|
|
Dimensionmm
|
650*520*1380
|
|
Body weightkg
|
60
|
|
power supply
|
110/220v 50/60HZ
|
|
Gas pressurebar
|
3-7
|
Additional explanation:
1.Action mode selection: fully automatic|semi-automatic|hand movement|self-programming
2.Startup method: Panel|Foot switch
3.Rotary positioning method: pneumatic pin
4.Rotary drive mode: pneumatic
5.Scraper working mode: Pneumatic mechanical valve drives cylinder up and down
6.Scraper pressure control: constant pressure of regulating valve
7.Fixture fixing method:TType groove table top, fixed with screws
8.Fixture material selection: Atomic ash|aluminum material|electrician|plastic|steels
9.Adhesive head fixing method: wooden screw locking
Introduce the detailed operation process of using a transfer printer for transfer printing
The printing process of transfer printers with traditional oil pans includes the following steps5Basic steps:
auxiliary word for ordinal numbers1Step: Fill the oil pan with ink
At the beginning, the steel plate on the oil pan will automatically be filled with ink, and then the scraper will scrape off the excess ink, leaving only the ink on the etched surface(That is, printing patterns)Many transfer printing machines are equipped with independent oil pans and scrapers, and the operating principle is similar to the rubber scraper of a screen printing machine. The ink used in transfer printing is similar to solvent based ink used in screen printing, with the only difference being that transfer printing ink has a higher pigment content, which can provide better transparency and viscosity, making the ink easier to adhere to printed materials. After the excess ink is scraped off the steel plate, the solvent gradually evaporates, and the ink concentration and viscosity become higher, making it easier for the ink to stick to the adhesive head.
auxiliary word for ordinal numbers2Step: Stick ink onto the adhesive head
When the adhesive head on the steel plate is pressed down, the ink immediately adheres. Because the ink becomes more viscous and concentrated, and the silicone adhesive head has a high tension, the ink can easily move from the steel plate to the adhesive head. In the improvement period of transfer printing machines, the depth of the steel plate was attempted to increase in order to increase the ink adhesion, that is, to increase the ink printed on the printed material. But this concept is actually incorrect. Because theoretically, the adhesive head can stick to the oil pan100%However, in reality, some of the ink has evaporated on the oil pan, so only a small portion of the ink sticks on in the end. In other words, increasing the depth of the oil pan does not significantly increase the amount of ink stuck on it.
auxiliary word for ordinal numbers3Step: Move the glue head onto the printed material
The adhesive head that has stuck ink will leave the oil pan and rise vertically, then move horizontally above the printed material. At this point, the ink gently adheres to the adhesive head, in a state where it is easy to erase but will not drip. The solvent on the surface of these inks evaporates again, and at the same time, the solvent inside gradually moves towards the adhesive head, causing the ink to begin to detach from the adhesive head
Step 4: Ink detaches from the adhesive head
Press the glue head onto the printed material to print the ink. Although the adhesive head can accurately print on the product, it is designed to roll on the printed material instead of pressing flat on the object. In addition, a well-designed adhesive head will not create gaps when in contact with objects. Because if there is a gap, it will allow air to pass through and hinder the ink from printing on the object.
auxiliary word for ordinal numbers5Step: Remove the adhesive head
After printing, the glue head will rise and return to its original shape. Just like the first3Step refers to the strong adhesion between the ink and the printed material when the adhesive head is pressed onto it, so all the ink will be printed on the printed material. Clean the adhesive head and stick ink on it for the next printing. The entire printing process continues to follow
|