-
E-mail
zejie168@163.com
-
Phone
15000755581,13564092740
-
Address
Building A, Chuangchuang Park, No. 875 Qiuxing Road, Pudong New Area, Shanghai, China
Product Categories
Shanghai Zoje Intelligent Technology Co., Ltd
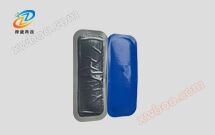
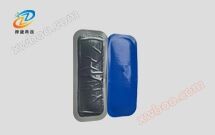
Tire RFID anti-counterfeiting label American/European standard
NegotiableUpdate on 10/28
- Model
- Nature of the Manufacturer
- Producers
- Product Category
- Place of Origin
Overview
Product Application Name: Tire RFID Anti Counterfeit Tags American/European Standard Tire RFID Anti Counterfeit Tags American/European Standard Suitable for various vehicle tire management, tire storage management, tire maintenance tracking records and other information management
Product Details
ⅠProduct Application
———————————————————————————————————————————————————————
NameTire RFID anti-counterfeiting label American/European standard
Tire RFID anti-counterfeiting label American/European standardSuitable for various vehicle tire management, tire storage management, tire maintenance tracking records and other information technologies
Administration.
Tire RFID anti-counterfeiting label American/European standardSuitable for various vehicle tire management, tire storage management, tire maintenance tracking records and other information technologies
Administration.
II Product Parameters
———————————————————————————————————————————————————————
| Chip protocol | EPC Class1 Gen2; ISO18000-6C |
| operating frequency | 865-868MHz/902-928MHz |
| IC type | ImpinJ MOZN4QT or Aline Higgs-3 |
| memory | EPX128 bit,User512 bit,TID96 bit |
| function | readable and writable |
| Using surface | Rubber, tire surface |
| Fixed reading distance of the reader/writer | 600cm-US,210cm-EU |
| waterproof rating | IP67 |
| Storage temperature | 25℃+100℃ |
| Operating Temperature | -20℃+90℃ |
| Product dimensions | 95*35*3mm |
| material | Professional rubber+spring |
| color | Black, Blue |
| installation process | sticky |
| The weight of each one | 6.4g/pcs |
III. Installation Method
———————————————————————————————————————————————————————
1. Installation positioning: The outer tire sidewall should not be more than 7.62cm away from the tire bead. Use tire cleaner to clean it.2. Compare the RFID tire tag and draw a size larger than half of the actual tag as the installation processing position.
3. Use a specialized grinding tool (low-speed) and a rough file to polish the label position, making the outer surface of the tire slightly fluffy.
4. Clean and polish the area without leaving any residue.
5. Apply tire specific adhesive (vulcanized rubber) evenly to the prepared area and remove the blue packaging (please be careful not to touch the gray adhesive on the back with your hands)
Install and press the adhesive surface firmly to release the air inside.
Product Image IV
———————————————————————————————————————————————————————

Similar Product Recommend