-
E-mail
kmic.web@krohne.com
- Phone
-
Address
9th Floor, Building 1, No. 396 Guilin Road (Puyuan Science and Technology Park), Xuhui District, Shanghai
Cologne China - Cologne Measuring Instruments (Shanghai) Co., Ltd
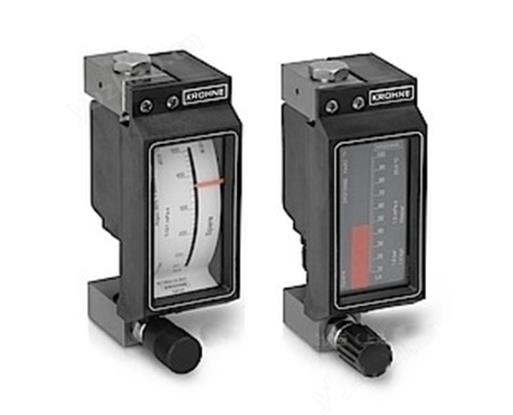
DK37 rotor flowmeter debugging guide, key steps for precise measurement
Date: 2025-11-13Read: 66
As a commonly used flow measurement instrument in industrial production, the measurement accuracy and reliability of DK37 rotor flowmeter largely depend on the correct debugging process.Mastering the scientific debugging steps is the foundation for ensuring the optimal performance of flow meters.
1、 Preparation work before debugging
1. Appearance and installation inspection: Confirm that the flowmeter installation meets the vertical installation requirements, and that the fluid direction is consistent with the arrow mark on the housing. Check the sealing of pipeline connections to ensure no leakage. Remove impurities such as welding slag and foreign objects in the pipeline that may affect the movement of the rotor.
2. Environmental condition confirmation: The working environment temperature should be controlled within the range of -20 ℃~80 ℃, and the relative humidity should not exceed 85%. Avoid installing flow meters near strong vibration sources or strong electromagnetic fields, and install protective devices if necessary.
2、 DK37 rotor flowmeter debugging operation steps
1. Zero point calibration:
① Close downstream valves to ensure no flow passes through;
② Gently tap the flowmeter casing to eliminate any possible sticking of the rotor;
③ Slowly rotate the zero adjustment screw to stabilize the rotor at the zero mark;
④ Confirm that the pointer is aligned with the zero position of the dial, with an error not exceeding ± 1% of the full scale.
2. Range calibration:
① Slowly open the upstream valve to gradually fill the pipeline with fluid;
② Fully open the downstream valve and establish a stable flow rate;
③ Compare the standard flow source and adjust the range adjustment screw;
④ Stabilize the rotor at the full-scale scale at maximum flow rate, with an error controlled within ± 2%.
3. Linearity check:
① Select 3-5 intermediate flow points (recommended 20%, 50%, 80% range);
② Adjust and record the deviation between the actual flow rate and the displayed value point by point;
③ By fine-tuning the position of the balance hammer, non-linear errors can be improved.
3、 After debugging, verify:
1. Stability test: Maintain a constant flow rate for 30 minutes and observe whether the rotor shakes or drifts.
2. Repeatability verification: Repeatedly start and stop the flow rate 3 times and check the consistency of each measurement result.
3. Sealing inspection: Confirm that there is no leakage at all connections, especially flange connections under high pressure conditions.
4、 Attention:
During the debugging process, the valve should be slowly adjusted to avoid pressure shock that may cause damage to the rotor;
2. Special debugging tools are required for highly corrosive media;
3. After debugging, it is recommended to record parameters such as ambient temperature and pressure;
4. Regularly (recommended every 3 months) conduct zero drift checks.
The precise debugging of DK37 rotor flowmeter is a key link to ensure measurement reliability. By following standardized debugging steps, not only can measurement accuracy be ensured, but equipment lifespan can also be extended. Remember, a patient and meticulous debugging process is a necessary guarantee for obtaining accurate traffic data.